The
scenario
While leading a
raid the old king has been stricken with illness and is close to
death. Local Warlords like wolves to a corpse hurry to where he lies
dying, as they know the first to take the crown from him will have a
strong claim to be the next king. However his son has eyes on the
crown himself.
Layout.
The game is
played on a 48"x48" table. In a 6" radius of the
centre point set up one of the options below, depending on what
scenery you have or just the layout you fancy.
A stockaded
village/farm of 3- 4 buildings.
A fortified camp.
A ruin of
some sort
A church/holy place within a enclosed burial area.
In fact any sort
of lightly fortified area, where defenders can choose to make a
stand. Each of the players can place 1 additional piece of scenery no
more than 6" to the edge of the area. Dice for priority as
usual.
You will also need tokens to represent the dying king and
his crown.
Deployment.
All players have
4 point warbands with warlords and the game lasts 7 turns.
Deployment is
exactly the same as in "A Feast For Crows", except the
highest scoring player becomes the "Kings Faction" and sets
up in the central fortified area, with the dying king token/figure.
This can be placed secretly in one of the areas structures if so
wished.
Special Rules.
As in "A
Feast For Crows" except for these scenario rules.
Intense
Rivalry-All Warlords wish to seize the crown for themselves. A unit
must attack (if activated) any unit belonging to a rival warband that
comes within S move distance of themselves.
Any warband
within the fortified area ignores this rule concerning enemy units
outside the defences.
Warlords Pride does not apply to Warlords
within the defences concerning enemy Warlords outside.
Seizing the
Crown. A warlord gains possession of the crown by moving next to the
dying king figure (presumably engaging in a quick bit of regicide)
and taking the crown token. A Warlord that is killed by another
Warlord loses the crown to the victor. If a Warlord is carrying the
crown and killed by another faction, the crown token is then placed
on that spot until another Warlord can pick it up.
For a four
player version, the old king might be a 'non player' faction with
the old king being guard by eight loyal hearthguard. So, at the
start of any turn they lose any fatigue they have acquired, and use
an opponents fatigue automatically, first for defence and then for
offence.
Victory
Conditions.
The factions
Warlord that holds the crown at the end of the game is declared the
winner. In the case of the"Kings Faction"this means the
dying king still has it or it has been recovered by the factions
actual Warlord his son. Any other result is a draw.
Scenario
Option.
One of the
Warbands is loyal to the old king and his family. Before deployment
let all Non "Kings Faction" players secretly draw a card
from a group of 4 (3 black and 1 red) whoever holds the red card is
secretly loyal to the old king Thus he can share victory with the
royal faction. How the player handles this is up to themselves.
Our
game:
We
played with the extra scenario option where one of the four
protagonists was actually allied to the dying kings family. In our
setup we chose a church yard. We played Irish, Scots, Anglo Danes,
Anglo Saxons with Norse Gaels as the dying kings protector.
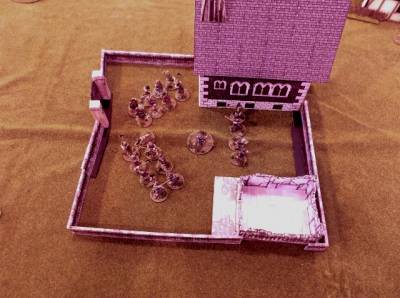
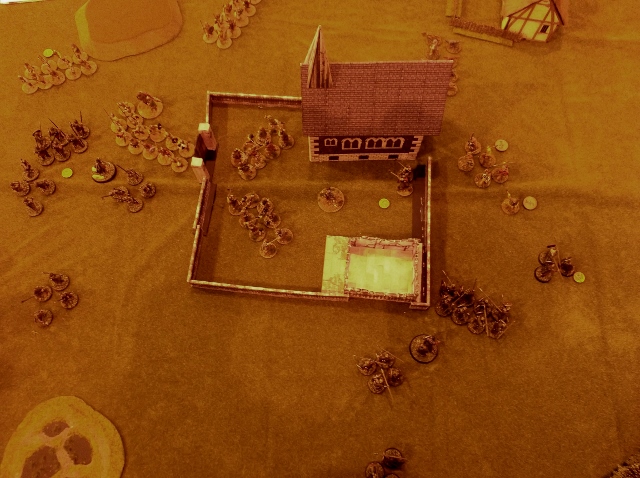
As
shown the Norse Gaels setup in the centre in the church yard with
the King and a unit inside the main building. The other warbands
setup in each of the corners, with only one piece of extra terrain
near to the corners.

The
Irish take position!!
Anytime
we play a multiplayer it often starts a little cautious until the
first is blood spilled then the slaughter begins. The Norse
Gaels with their two handed axes and challenges we probably the
toughest to hold the centre. Each turn they would hold onto those
saga dice until someone was mad enough to come near those walls.
The
first two turns saw the warbands move up and take position. But even
at turn 2 the sneaky Irish kids loosed a blistering volley of
javelins into a unit of Scots and killed 4 warriors. (The Irish used:
Sons of Dana, Bansidh Whispers, Fir Bolg and Eagle Eye). Something
the Scots never forgot in the later game. While the Anglo Danes
intimidated the Anglo Saxons - much to their annoyance.
The
Scots on the bottom right after a punishing raid from
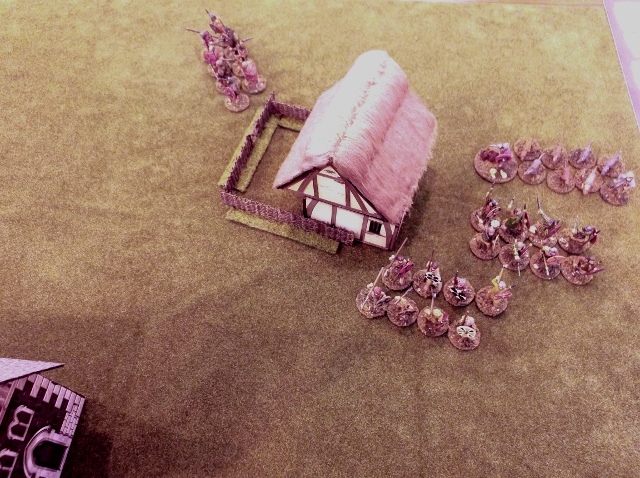
Irish Sons of Dana.
The
Irish on the top right near the house.
We
decided that the churchyard provided the Norse Gaels with soft cover
while there units were in any part the whole area, the
defenders got a heavy cover bonus when defending the
wall for the first contact in melee. Only the Church was considered a
building giving hard cover and usual building Saga rules. But if
an enemy was in the churchyard or on another round of combat then the
cover bonus was lost. An issue came with Irish moving to attack
the Norse Gaels defending the wall. Since the first round
the Norse Gaels got the hard cover save, the Irish won and force
the Norse Gaels back into the churchyard away from the wall. The
Norse Gaels attacked immediately the Irish unit outside the
church wall, we felt that this did not give them a hard cover
bonus because the scenario had the Norse Gaels in a defended an
enclosed semi-fortified area. (If it was just a wall in a field
or at a road then the Irish would have had the hard cover bonus). We
considered the Norse Gaels were retaking their defence positions
rather than running across open land to a defended position.
As
the game played it was clearer that the Anglo - Saxons were taking on
a defensive position and fending off the Anglo Danes. The Irish moved
up to the wall and after trying out their javelins against the Norse
Gaels - this time with less devastating affect but still kill
one or two. The Irish persisted in being a pest to the Norse Gaels as
they played hide and seek with the Heirs of Will that made them
invisible to the Norse Gaels. It did not make the other Irish units
invisible to the annoyed Scots who arrived on the Irish flank and
took some revenge wiping out a unit of warriors and reducing another
unit to 1 figure.
The
Anglo Danes threw themselves at the Anglo Saxsons and both
warbands were rather beaten up by turn 5. By this time after the
Scots tried a suicidal jump at the Norse Gaels by holding the ruined
building in the churchyard corner. The Norse Gaels responded by
challenging them using Who's Next and others until the Scots unit
is destroyed. The Scots responded with their warlord and another unit
to wipe out a unit of the Norse Gaels. At this point it was
clear the Anglo Saxons were on the Kings side, and with too much in
house fighting caused by the clever scenarios requirement that any
enemy unit within S must attack each other, no one was strong
enough to threaten the Norse Gael stronghold in the churchyard. Nor
was there enough time.

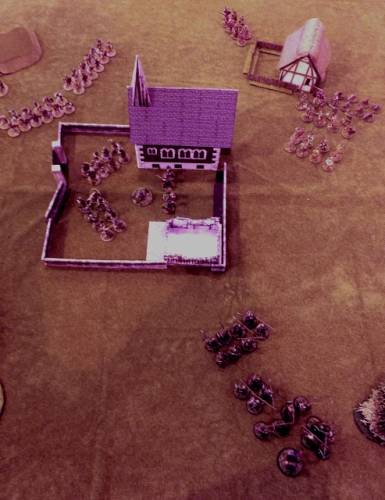
Near
the last turn all four warbands are battered and beleaguered.
But
the Norse Gaels still hold the centre and the objective.
In
the last picture the Anglo Saxons hold the top right position near
the hill. The Anglo Danes just below them above the swamp. On the
right-hand-side at the top the remaining Irish, and below them the
Scots. In the final turn without even an enemy keeping a foot in the
churchyard let alone touching the door of the church it was a Norse
Gael / Anglo Saxon victory.
We all agreed it was a great scenario and look forward to trying it again. We did feel that it should be 10 turns rather than 7 as it took 3 turns just to get in position - or were we too cautious?
Source: http://Saga, Bloody Succession, Saga 4 player scenario, Saga scenario, Anglo Danes, Anglo Saxson, Scots, Irish |