Bloody Big Battles – Aspern Essling 21st - 22nd May 1809
Setup
á North
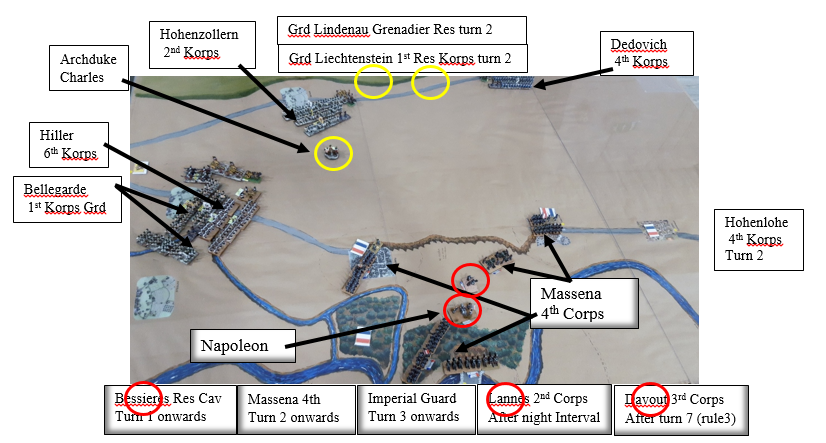
Setup – of the 2nd game played 1_12_2024
The circles show the difficulty the Austrians faced,
better positioned but still a lack of effective generals (the
three yellow circles), compared to the 5 French (red circles).
The terrain map was put together with brown wrapping paper – 100gsm 750mm x 50m Kraft Wrapping paper. Overlapping in the middle set to size 6’ by 4’ with side edge extra for strength of a few inches – glued with PVA / glue stick. Terrain map basic layout courtesy of Mark Smith’s BBB Napoleon battle scenarios. So I sketched out to scale and painted on with Acrylic paints to designate the hills, roads, woods (an adaption I chose from the lovely maps created by Colin in our 20mm campaigns – see Simon’s blog on http://www.servicerationdistributionhobby.blogspot.com ). Found with 15mm figures the 2D maps are the easiest and Mark’s maps and positions of terrain make all the difference in the battle. So cheap, easy to store, and if you are finished with it then environmentally easy to dispose of.
In this map the hills are gentle shown as light green. With roads and the built up areas are villages except Aspern and Gross Entzerdorf which are towns (+2), and Essling which is a fortress (+3). The river Danube is impassable at the bottom of the map, the others smaller one is a stream as describes in the scenario. This map has the villages, towns ,and fortress are shown as aerial images approximately 4” by 3”, with the victory condition areas marked with a yellow dot. I have now made up 2 sided victory condition cards French flag on one side Austrian on other, with another set of just yellow stars to represent contested victory condition.
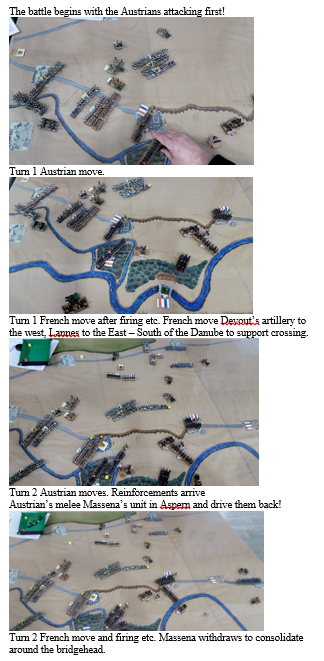
Over the course of a few weeks we used this scenario as a testing game to get to grips with more of the BBB rules now with a bern, entrenchments, towns / fortress, and a night interval. Each game was close and enjoyable and allowed a better understanding each time. The actual game was 9 turns plus night interval. The Austrians have a little more flexibility on setup positions again but suffer with the lack of command and most troops Passive. The French hope to get a unit a turn over the unreliable bridge and not get too penned in.

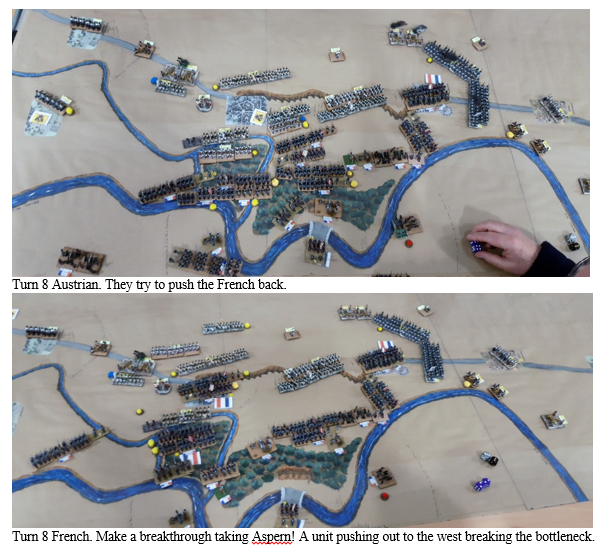
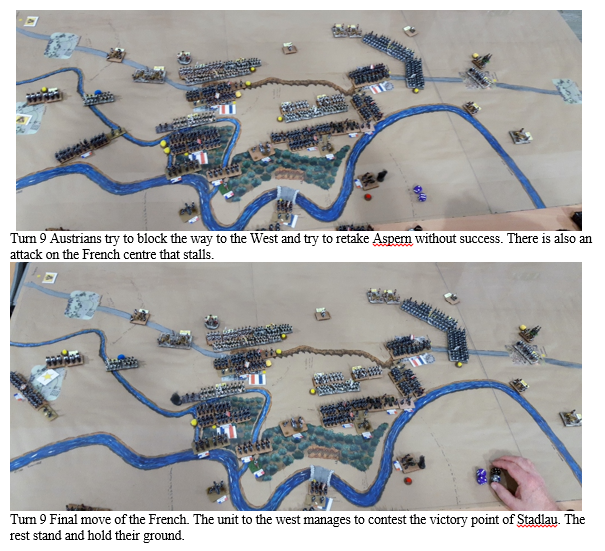
Final result French 4 points. Victory to the French!
In this second game the French player managed to get several units over the bridge in the game (whereas only 1 manged over – apart from Lannes night interval reinforcements – in our first trial).
Unit labels are on sticky labels that have a tab stuck to the base, Yellow colour for the Austrians, Blue white red for the French. Just in case the labels came off and to quickly identify when making up the armies. These can be folded underneath, folded vertically up, or left behind the unit.
To speed up the setup I did require the units to be prepared beforehand, but the whole battle was fought with less than 4 box files of figures. The 15mm here are 40mm x 30mm (used for Shako II) so larger than 1” x 1” Chris Pringle suggests, but still played well.
Another major setup speed up was to add the deployment positions and ranges (added to this map later just with pen). This meant a setup for this and future games was achievable in 30 to 40 mins – rather than an hour and a half.
For the markers for DISRUPTED, LOW AMMO, SPENT, REDUCED ARTILLERY etc I used a bag of small multi-coloured pompoms from the Range (for about £1) and used invisible No More Nails to glue them on a bag of ½ pence pieces that were just ideal for the markers.
After playing a few games it was clear to help speed things up that a Brigade of “4S” was better using 3 regular stands and a skirmish stand – a good visual on the benefits the unit had. We also found that putting the yellow SILENCED marker, or the black LOW AMMO at the front of the Brigade when it occurred then moved to the back on the next phase, or when the artillery had been moved back it’s minimum ½ move got new players into the rhythm of the turn sequence a lot faster. Allowed with a little housekeeping a good way to keep on top of what was happening where and when. It allowed the game to proceed quicker and with fewer arguments. The artillery being limbered also came under this. A limbers at the back of the artillery, pointing the direction it is being moved (so no worries – was that limbered? Or deployed?). The addition of if the artillery piece had moved ½, unlimbered the gun was deployed pointing in its required direction with the limber across the front of the base – to show no shooting this phase. Whereas if the gun that was limbered is deployed in place the gun was deployed pointing in its required direction with the limber perpendicular across the back of the base – to show half effect shooting this phase. Making the players responsible for the housekeeping kept them focused and we had very few cases of mistakes being made that players might feel would have had a major effect on the battle.
Having Zone of control templates was very useful, showing the 3” as in the rule book but also showing the 45o to the edge for firing / front arc, and another double 45o at the Front Centre Position for movement and when penalties would be applied. Images of these and use of the tokens in the Eckmuhl battle report.
At the time of me writing this we have played Eckmuhl several times, this victory affected Massena’s troops getting the Aggressive ability in the Wagram scenario.
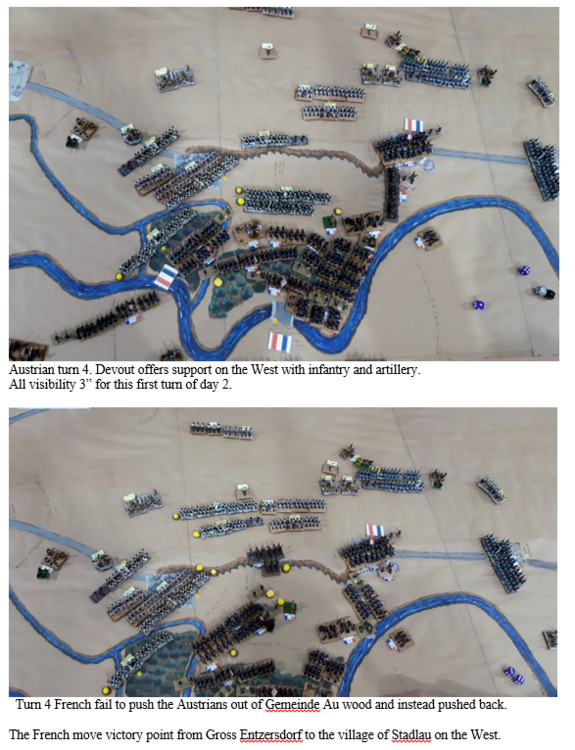
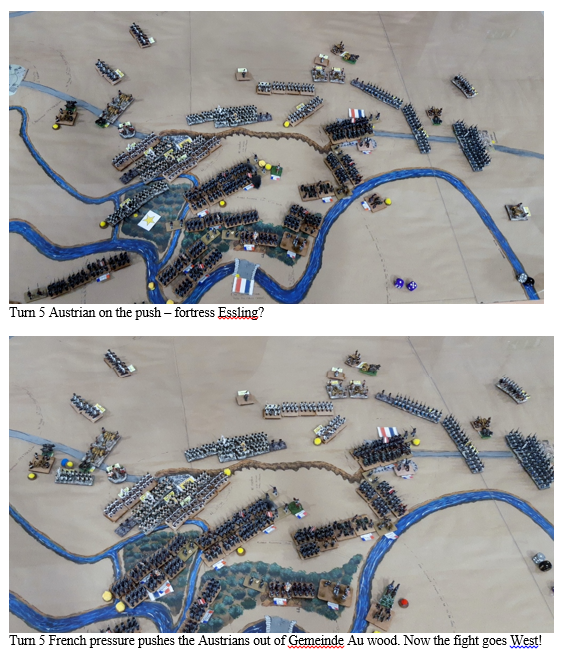
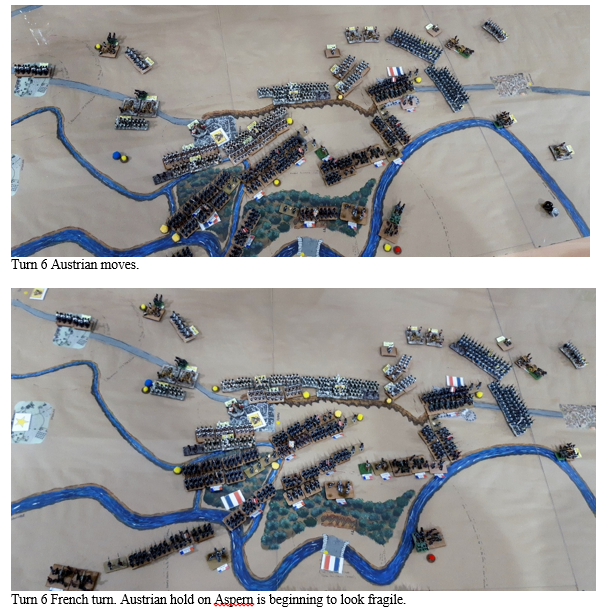
In the first time we played this scenario of Aspern Essling the French player was cautious, but when realised that Devout was unlikely to get a unit across it looked the best option to send out to protect the flanks (in this case to the East and was done in day 2), with Lannes artillery to the west for the first 3 turns (then was moved across in night interval). In the second game the support artillery & infantry were moved out in turn 1. I drew a 12” limit for the French around the bridge to the South of the Danube to allow the players to see units in that area would be eligible to cross if the bridge open and they were eligible. We were not sure that when the French get to move the Gross Entzersdorf victory to another village as an objective if it became open until a unit got to it – but we soon decided that was the best. It put some pressure on the Austrians who then sent two cavalry units to capture it (in the first game the French chose Muhleuthen on the South East). The first game resulted as a draw
To keep the game flowing I made up a basic crib sheet showing table of turns 1 – 9, the scenario specific terrain effects, melee / shooting benefits, and the victory conditions. This helped keep the pace up and made sure which of the French units could move across when the bridge was open.
I hope to put up my battle report on the Wagram scenario in the next month, and some downloads for unit markers, victory markers, and turn crib sheets for Aspern Essling and Wagram on PDFs.
Bye for now. | 


