Introduction:
French columns marched into Portugal over poor roads. Limbers and caissons quickly broke down or fell behind. The leading French units stopped when they encountered the allied rear guard on the afternoon of the 23rd. The French waited for the rest of the 2nd Corps to arrive.
Setup
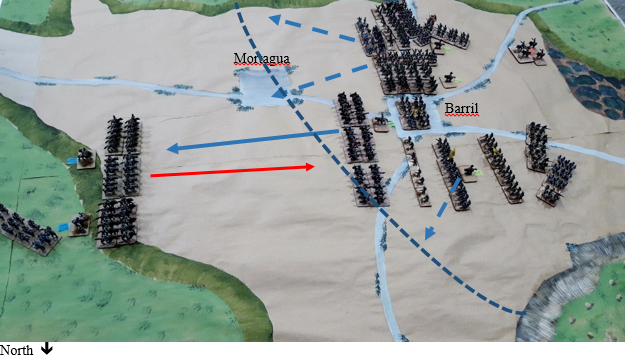
Note: the Red arrow shows the French line of attack, the solid blue line shows the British cavalry attack arrow. The blue dashed line show the Defend in depth. In ShakoII the Divisions set up in their deployment zones the Generals are fixed but the units can move to positions provided within the command radius of the Generals. The British plan was to move up and occupy Mortagua and set a defensive line from there.
The terrain map was put together with brown wrapping paper – 80gsm 750mm x 50m Kraft Wrapping paper. Overlapping in the middle set to size 5’ by 4’ with side edge extra for strength of a few inches – glued with PVA / glue stick. Terrain map basic layout courtesy of Michael Hopper’s - Rise of Albion scenario book. So I sketched out to scale and painted on with Acrylic paints to designate the hills, roads, (an adaption I chose from the lovely maps created by Colin in our 20mm campaigns – see Simon’s blog on http://www.servicerationdistributionhobby.blogspot.com ). Found with 15mm figures the 2D maps are the easiest and Michael’s maps and positions of terrain make all the difference in the battle. So cheap, easy to store, and if you are finished with it then environmentally easy to dispose of.
In this map most of the hills are gentle, except the steep sided hill on the bottom right of the picture and there are two small groups of woods.
I am playing the Allies CinC Craufurd, with Pack as General who has 4 Average infantry, 1 light infantry and 1 skirmisher. Beckwith as the General with 3 light infantry units (95th Elite, 43rd large, and Portuguese Cacadores). Barclay as the General with 3 light infantry units (95th Elite, 52nd large, and Portuguese Cacadores) and 1 skirmisher. Anson as the General with 3 light cavalry (2 light Dragoons, 1 Elite KGL Hussar). Alan is the French CinC Renier (off table on turn 1 with foot artillery), with General Lamotte who has 2 Light cavalry (2 Hussar, 2 Chasseur) and general Soult who has 2 Light cavalry (2 Hussar, 2 Chasseur). Off table Sarrut (on turn 1) 3 average infantry, 1 2nd rate infantry, 1 skirmisher, 3 Light infantry, 1 2nd rate light infantry, 1 skirmisher. Graindorge (on turn 2) has 3 Light infantry, 1 2nd rate light infantry, 1 skirmisher. The Allies setup first with Anson on new orders (I chose attack) the rest on defend orders. The French who deploy second have all on attack orders. You would get the full scenario details in Michael’s book - Rise of Albion.
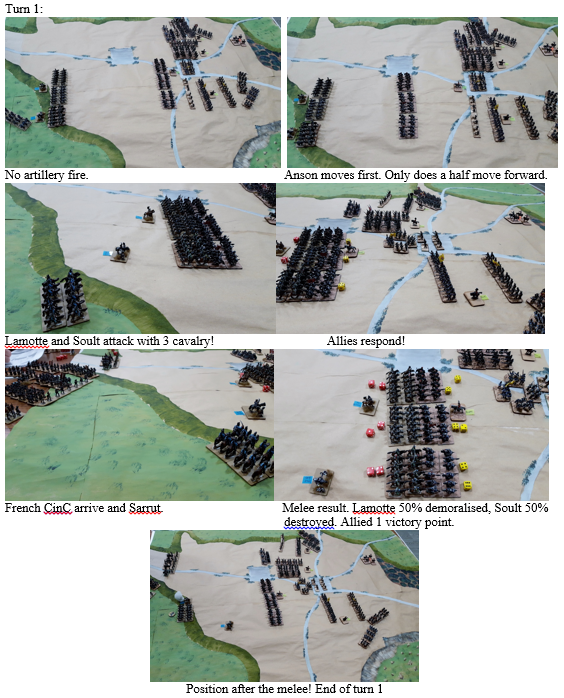
Note: The Allied plan was to draw the French cavalry into within attack distance of all the allies infantry divisions (hence the half move). It also allowed them to counter attack in only one French division attacked. This releases them from Defend orders and allows them to move forward against know enemy. It is a risky strategy as if the outnumbered Allied cavalry break then a whole flank and centre are pinned by French cavalry that can be mopped up by French Foot artillery and infantry.
With larger battles like this one we use designated cards to randomise which Division moves first.
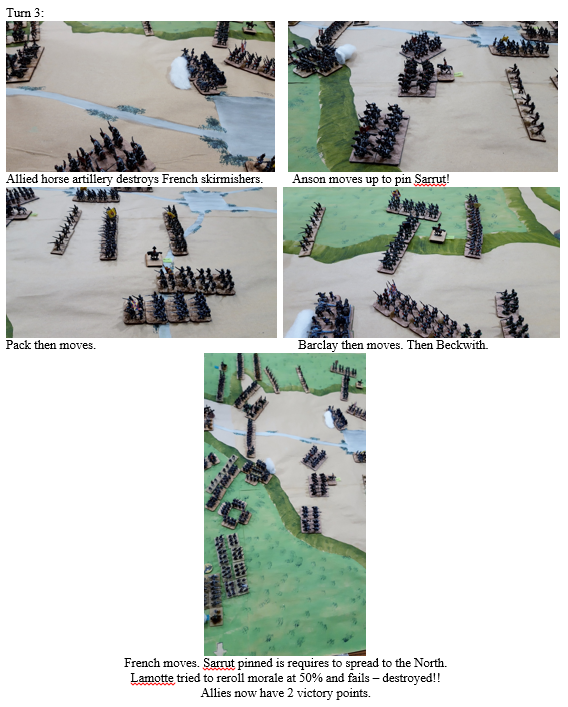
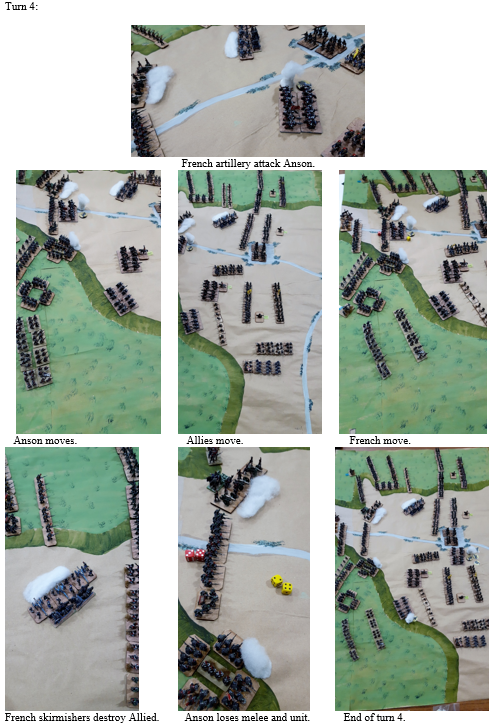
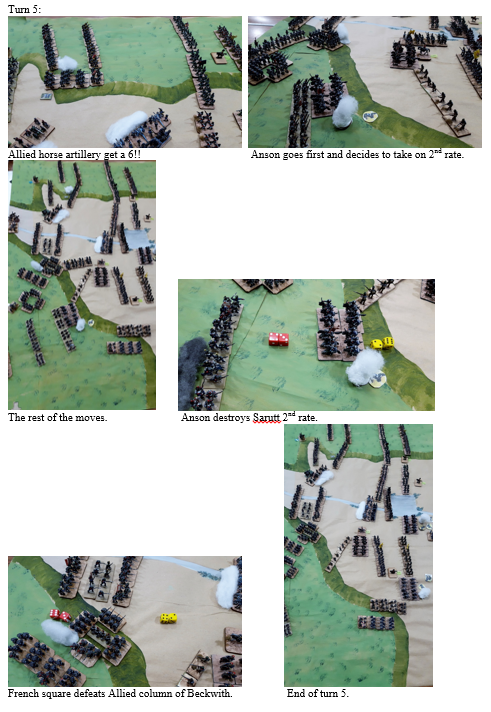


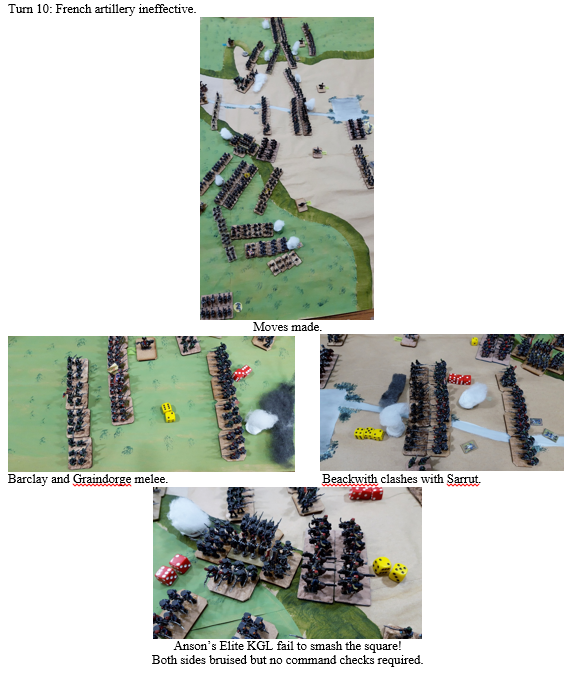
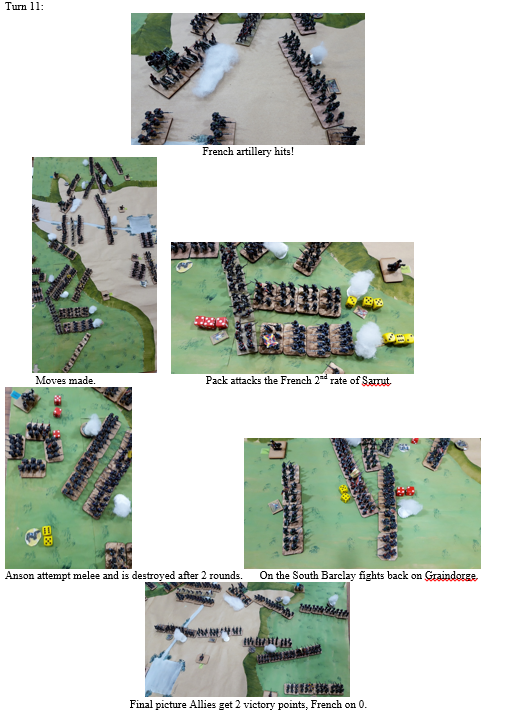
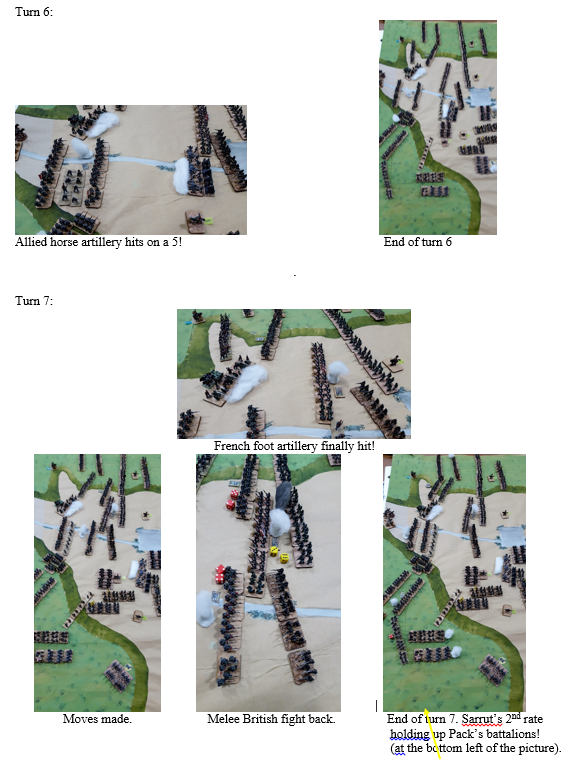
Another enjoyable afternoon that was very close again, this was our second battle. The French losing the cavalry battle at the start made the big difference. With the Allies using Anson’s cavalry to pin the large force of Sarrut before they could properly deploy on the table made a big difference to this game. The French foot artillery was well positioned but kept failing to hit on canister fire – luckily for the Allies. Needless to say a rematch is very likely for this battle.
|